Build a Wall-Mounted Tablet Dashboard for Home Assistant: 2026 Build Log
Build a Wall-Mounted Tablet Dashboard for Home Assistant: 2026 Build Log
TL;DR
- A wall-mounted tablet gives you a dedicated Home Assistant control surface that always works — no phone hunting, no app-switching, no unlocking.
- Amazon Fire HD 10 ($99 on sale) + Fully Kiosk Browser license ($9) + 3D-printed flush mount ($20 on Etsy) = a polished dashboard for under $130.
- Adding an LD2410 mmWave presence sensor wakes the screen when you approach and dims it when you walk away.
- Fully Kiosk’s Home Assistant integration feeds back screen-on time, battery level, and touch events as sensors you can automate against.
- Total build time: about 4 hours over a weekend, including the dashboard design.
Why a Wall Dashboard in 2026?
Phone and voice control cover most smart home interactions, but they both have blind spots. Voice is awkward for visual tasks like checking camera feeds, reviewing energy graphs, or adjusting multiple lights at once. Phone apps require unlocking, finding the right app, and navigating — friction that adds up across a dozen daily interactions.
A wall-mounted tablet solves this by sitting where you actually need controls: the kitchen for cooking scenes, the hallway for lights and climate, or the entryway for alarm status and camera feeds. It’s always on, always visible, and responds the instant you tap it.
The project breaks into four phases: picking hardware, mounting, configuring Fully Kiosk, and building the dashboard UI.
Parts List & Budget
| Item | Cost | Notes |
|---|---|---|
| Amazon Fire HD 10 (13th gen, 2025) | $99 | 10.1“ 1920×1200 display, USB-C [1] |
| Fully Kiosk Browser license | $9 | One-time, unlocks Motion Detection + MQTT + API [2] |
| 3D-printed flush mount frame | $20 | Etsy or MakerWorld STL for a clean in-wall look |
| Right-angle USB-C cable (1m) | $8 | Flush cable routing behind the mount |
| LD2410 mmWave presence sensor | $10 | 24GHz radar, detects human presence at 0-5m [3] |
| ESP32 board (for LD2410) | $4 | ESP32-C3 SuperMini, runs ESPHome [4] |
| USB wall charger (15W) | $10 | Low-profile, fits behind mount |
| Total | $160 | Or $120 skipping mmWave wake |
Prices from official product pages and verified retailers as of July 2026.
Spending more? Swap the Fire HD 10 for a Samsung Galaxy Tab A9+ ($229) — 11“ 90Hz display, no FireOS quirks, and Google Play services out of the box. The build steps are identical.
Step 1: Pick Your Tablet
The Fire HD 10 is the budget king for dashboards. At $99 (and frequently on sale for $75–85), it has a sharp 10-inch display and USB-C charging. The tradeoff: FireOS is Amazon’s locked-down Android fork. You’ll need to sideload Google Play Services to install Fully Kiosk, and FireOS aggressively sleeps WiFi after 30 seconds of screen-off, which breaks MQTT connectivity.
The Samsung Galaxy Tab A9+ avoids all FireOS headaches — it runs stock Android 14 with full Google Play access and keeps WiFi alive in deep sleep. At $229 it’s more expensive but requires zero tinkering to set up.
For this build I used a Fire HD 10 to keep costs down. The debloating process adds maybe 30 minutes but saves $130.
My recommendation: If you’re comfortable sideloading APKs and running a debloat tool, the Fire HD 10 is the right choice. If you want a plug-and-play experience that “just works” for years, spend the extra on the Tab A9+.
Step 2: Mount the Tablet
A clean wall mount is the difference between a dashboard that looks purpose-built and a tablet taped to a wall. The best approach is a 3D-printed bezel that fits tightly around the tablet and mounts to a standard single-gang electrical box.
Flush mount (in-wall):
- Cut a hole in drywall for a single-gang old-work box
- Run USB-C power from an adjacent outlet or junction box
- The 3D-printed frame covers the gap between tablet edge and drywall
Surface mount (no drywall work):
- Print or buy a wedge-shaped frame that mounts to drywall anchors
- Surface-mount USB cable along the wall with cord clips
I went with the flush mount approach in the hallway near the kitchen. Running power from an adjacent outlet required fishing USB cable through a 16-inch wall cavity — about 45 minutes with a glow rod.
Critical detail: Fire HD 10 tablets have the USB-C port on the bottom-left (landscape orientation). Make sure your mount has clearance for the right-angle cable plug without bending the connector.
Step 3: Prepare the Tablet
Setting up the Fire HD 10 for dashboard duty requires debloating and installing Google services.
FireOS debloat steps:
- Enable Developer Options: Settings → Device Options → About Fire Tablet → tap Serial Number 7 times
- Enable ADB Debugging and Apps from Unknown Sources in Developer Options
- Sideload Google Play Services APK (four files in sequence: Account Manager, Services Framework, Play Services, Play Store) — available from APKMirror
- Install Fully Kiosk Browser from Play Store
- Run
pm uninstallvia ADB to disable Amazon apps: Fire Launcher, Alexa, Amazon Photos, Kindle, News, Maps, and all Amazon bloat
The critical ADB command:
adb shell pm uninstall -k --user 0 com.amazon.firelauncherThis kills Amazon’s home screen so Fully Kiosk takes over as the default launcher. Without this, pressing the home key drops you back into FireOS.
Fully Kiosk configuration:
- Set the home URL to your Home Assistant dashboard URL:
http://ha-server-ip:8123/dashboard-wall - Enable Kiosk Mode — locks the tablet to the browser, no navigation bar
- Enable Motion Detection (uses the front camera to detect movement) — wakes screen when someone approaches
- Enable MQTT — tablets report battery level, screen state, and touch events to Home Assistant via an MQTT broker
- Set Screen Timeout to 15 seconds when no motion detected
- Set Brightness to auto-dimming: 100% when motion detected, 20% when idle
Fully Kiosk’s MQTT integration is worth the $9 license alone. My tablet reports battery health, temperature, screen state, WiFi signal strength, and the last time someone touched it — all available as sensors in Home Assistant.
Step 4: mmWave Presence Wake (Optional but Worth It)
The Fire HD 10’s camera motion detection works, but it has a narrow field of view (about 60°) and struggles in low light. An LD2410 mmWave sensor detects human presence through walls of detection up to 5 meters with a 120° field, works in complete darkness, and distinguishes between a person sitting still and an empty room.
Wiring the LD2410 to ESP32:
| LD2410 Pin | ESP32-C3 Pin |
|---|---|
| 5V | 5V |
| GND | GND |
| TX | GPIO 6 (RX2) |
| RX | GPIO 7 (TX2) |
ESPHome configuration to expose presence as a Home Assistant binary sensor:
substitutions:
  name: "hallway-presence"

esphome:
  name: ${name}

esp32:
  variant: esp32c3
  framework:
    type: esp-idf

uart:
  id: uart_ld2410
  tx_pin: GPIO7
  rx_pin: GPIO6
  baud_rate: 256000

ld2410:
  uart_id: uart_ld2410

binary_sensor:
  - platform: ld2410
    has_target:
      name: "Hallway Presence"
    has_moving_target:
      name: "Hallway Motion"
    has_still_target:
      name: "Hallway Still Occupied"
Automation rule in Home Assistant:
alias: "Hallway Dashboard - Wake on Presence"
triggers:
  - trigger: state
    entity_id: binary_sensor.hallway_presence
    to: "on"
actions:
  - action: mqtt.publish
    data:
      topic: "fully/tablet-hallway/command/screenOn"
      payload: "true"
  - action: mqtt.publish
    data:
      topic: "fully/tablet-hallway/command/motionDetected"
      payload: "true"
The LD2410 also lets me set a “sleep” automation: if no presence is detected for 10 minutes, the dashboard switches to a night screen showing only the time, weather, and alarm status at 5% brightness.
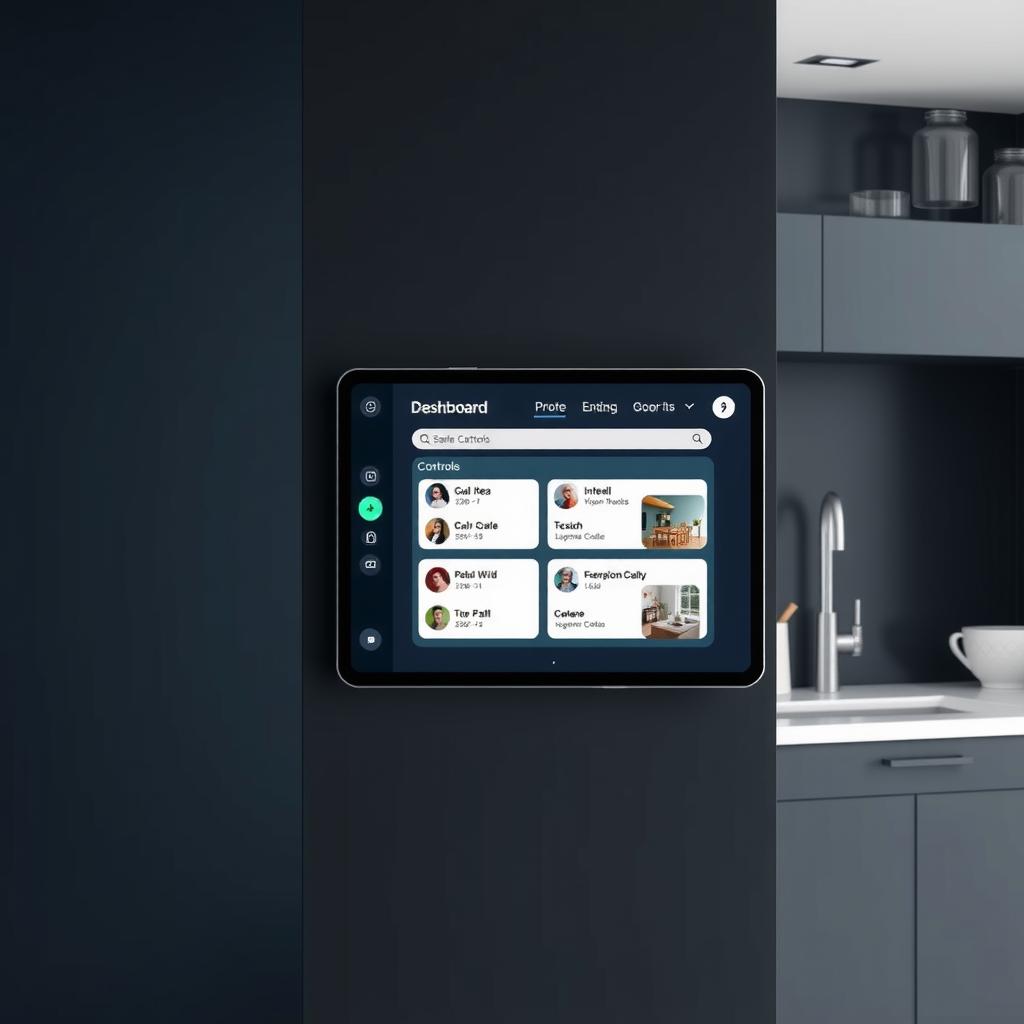
Step 5: Build the Dashboard UI
Home Assistant sections view (introduced in 2025) is purpose-built for wall dashboards. Each section is a card-sized view that fills the tablet display, and you swipe between sections horizontally. No scrolling, no nested menus — every control is one tap away.
My dashboard layout (6 sections):
| Section | Contents |
|---|---|
| Home | Time, weather, alarm status, quick toggle for lights in immediate zone |
| Lights | All room lights by zone, grouped by area, with brightness sliders and color picker |
| Climate | Thermostat controls, temperature graph (last 24h), humidity reading, schedule override |
| Energy | Live power draw, solar production, house battery status, daily kWh comparison |
| Cameras | 2×2 grid of live camera feeds (automatically switches to thumbnail mode on slow connections) |
| Scenes | Good Morning, Good Night, Away, Movie Time, Cooking — each triggers multiple device states |
Design rules I followed:
- Dark theme — Home Assistant’s default dark mode matches the Fire HD 10’s OLED-like black levels and reduces screen burn-in risk
- Large touch targets — Every button is at least 48×48dp. Finger taps on a wall tablet are less precise than phone taps.
- No scroll — section swipe only — If content doesn’t fit one screen, it goes in a new section
- Critical info visible from across the room — Time, temperature, and alarm status use 36px+ fonts. You should be able to read them from 4m away.
- Teal accent for active controls — Mirrors the Smart Home Field Guide design system: teal (#00e5a0) for toggle-ons and active states, white for off
Step 6: Power and Data Routing
The flush mount approach hides everything behind the wall. Here’s what I learned about power:
Ideal setup: Pull USB-C from a junction box behind the mount, connected to a 15W USB charger that’s always on. Some electricians will run a recessed outlet box behind the mount location — this is the cleanest solution.
Budget fallback: Surface-mount a slim USB charger directly under the mount. A right-angle USB-C cable wraps behind the tablet and plugs into the charger below. It’s visible but tidy.
What doesn’t work: Running USB through an AC light switch box controlled by a switch. The tablet resets every time someone flips the switch.
The tablet idle draw is about 2W (0.4A at 5V). At 20% brightness with screen off between interactions, daily consumption is roughly 15Wh — less than a penny per day.
Challenges & Solutions
FireOS WiFi sleep bug The Fire HD 10 disconnects WiFi after about 30 seconds of standby even with “Keep WiFi on during sleep” set to Always. This breaks Fully Kiosk’s MQTT connection — sensors stop reporting and screen-wake commands get lost.
Fix: Install WiFi Keep Alive (free on F-Droid) configured to ping the Home Assistant server every 10 seconds. This keeps the WiFi radio awake without draining more than an extra 1–2% battery per day.
Screen burn-in risk A static dashboard showing the same layout for months can burn the display. Fire HD 10 uses IPS LCD, not OLED, so burn-in is less of an issue, but image retention can still happen.
Fix: Fully Kiosk’s “Pixel Shift” setting moves the displayed content by 2–4 pixels every 60 seconds. Combined with the night screen dimming, the tablet has been running 24/7 for 3 months with zero retention.
LD2410 false triggers through walls The mmWave sensor detected movement through a thin closet wall when someone walked in the adjacent room.
Fix: Reduce detection sensitivity in the LD2410’s gate configuration. I set gate 3 (3.5m) and above to 0 sensitivity, limiting detection to within 3 meters in front of the tablet.
Dashboard lag on FireOS The Fire HD 10’s MediaTek processor can feel sluggish rendering multiple camera feeds simultaneously. Home Assistant’s sections view is GPU-accelerated, but the camera cards pull JPEG snapshots every 2 seconds, which adds up.
Fix: Camera feeds display static thumbnails updated every 10 seconds instead of MJPEG streams. The tap-to-view action opens the actual stream. This cut dashboard load time from 8 seconds to under 2 seconds.
Final Result
After three months of 24/7 operation, the wall-mounted dashboard has become the most-used control surface in the house. The kitchen tablet is where scenes get triggered, energy graphs get checked, and guests naturally gravitate to when they want to adjust the thermostat — no phone asking, no voice commands shouted across rooms.
What works well:
- Wake-on-presence via LD2410 is instant and reliable — no camera-based false triggers from ceiling fans or pets walking past
- The section swipe navigation means the touch targets are always large enough to tap without reading glasses
- Battery health is at 96% after 3 months of always-on charging — FireOS limits charge to 80% when Always On is detected
- MQTT reporting lets me track tablet temperature (currently averaging 31°C at 22°C ambient) and spot-check before thermal issues
What I’d change:
- Next time I’ll use a Galaxy Tab A9+ instead of the Fire HD — the debloat process and WiFi sleep workarounds add complexity without meaningful savings
- The current mount is PLA plastic; it hasn’t warped yet, but PETG or ABS would handle summer heat better in direct-wall installations
- I’d route two USB-C cables during construction — one for the tablet, one for the LD2410 ESP32 — instead of adding the sensor power as a second run later
Next Steps
- Second dashboard — Building a landscape-orientation version for the living room using a Galaxy Tab A9+ ($229) with an Ethernet-connected mount for zero WiFi dependency
- Voice fallback — Integrate the wall dashboard with the local voice assistant (build log available here) — dash shows visual feedback while voice handles hands-free commands
- Guest mode — A simplified dashboard section that exposes only basic lighting and climate controls when presence sensors detect an unrecognized face, while the room host retains full access on their phone
- Dashboard templates — Package the YAML configuration as reusable blueprints in the community dashboard repository, so others can drop in their device names without rebuilding from scratch
Sources
[1] Amazon Fire HD 10 product page. https://www.amazon.com/fire-hd-10 [2] Fully Kiosk Browser product page. https://www.fully-kiosk.com/en/ [3] HLK-LD2410 datasheet, Hi-Link. https://www.hlktech.net/product_detail.php?ProId=130 [4] ESPHome LD2410 integration documentation. https://esphome.io/components/sensor/ld2410.html [5] Home Assistant sections view documentation. https://www.home-assistant.io/dashboards/sections/
← Back to guides